WiFi
Brief
Sentry2 has an on-board ESP8285-WiFi chip which can be programmed by Arduino IDE directly to realize online-recognition, image transmission, AIoT and other applications. ESP8285 can be used as a controller for K210 which is help for AI programming without external device.
Development Environment
Add ESP8266 Board
Firstly, Download and install Arduino IDE:
https://downloads.arduino.cc/arduino-1.8.19-windows.exe
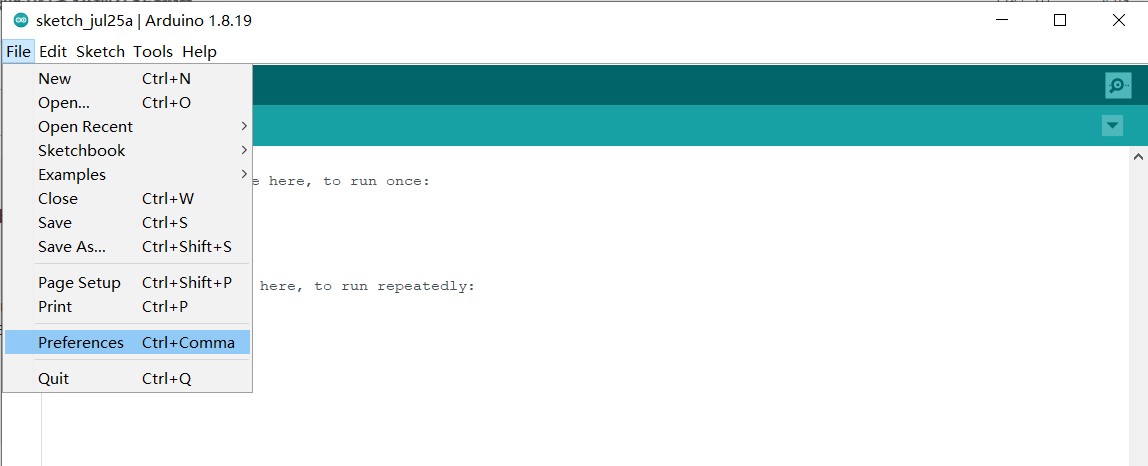
Run Arduino IDE and Open “File” >“Preference”
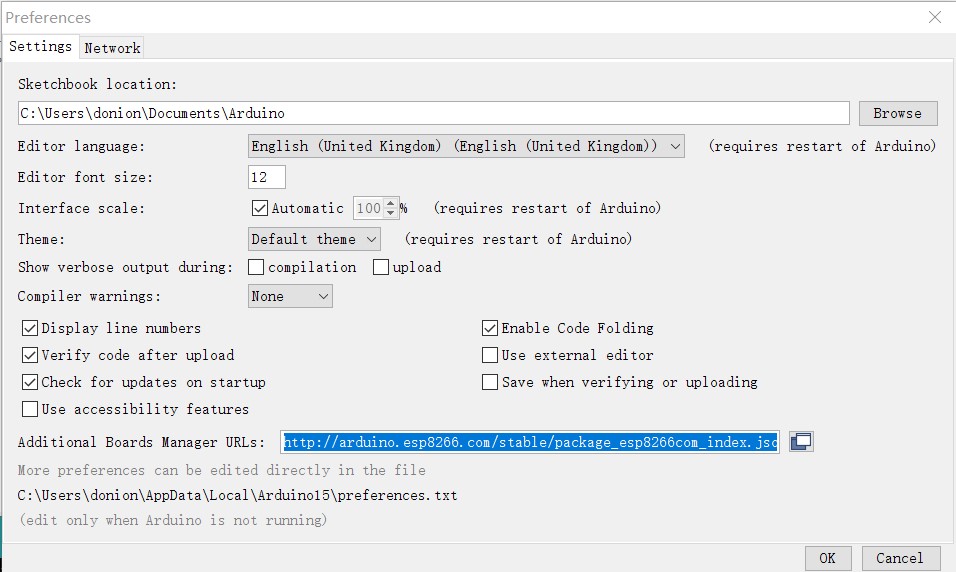
Input the URL to “Additional Boards Manager URLs” and click “OK”
http://arduino.esp8266.com/stable/package_esp8266com_index.json
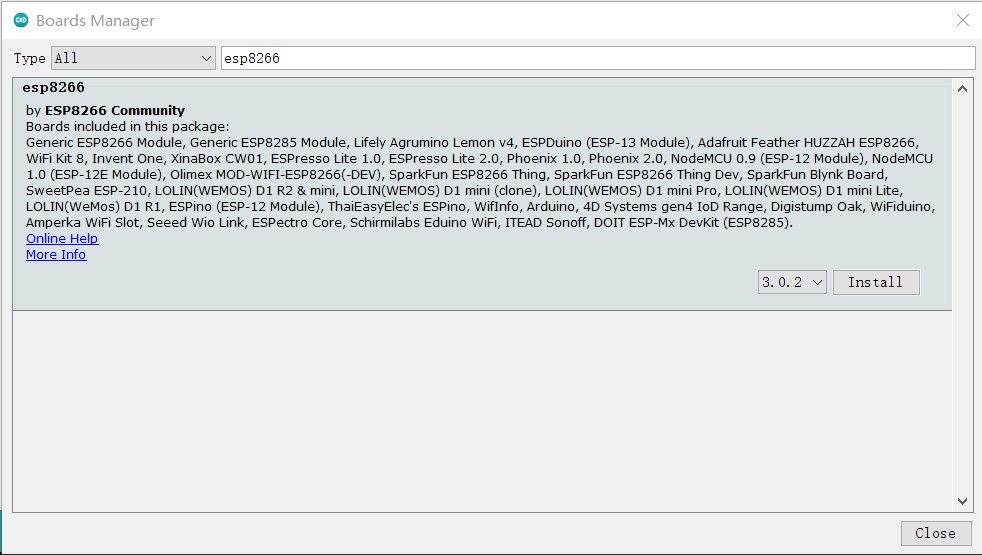
Open“Tools”>“Board”>“Boards Manager”
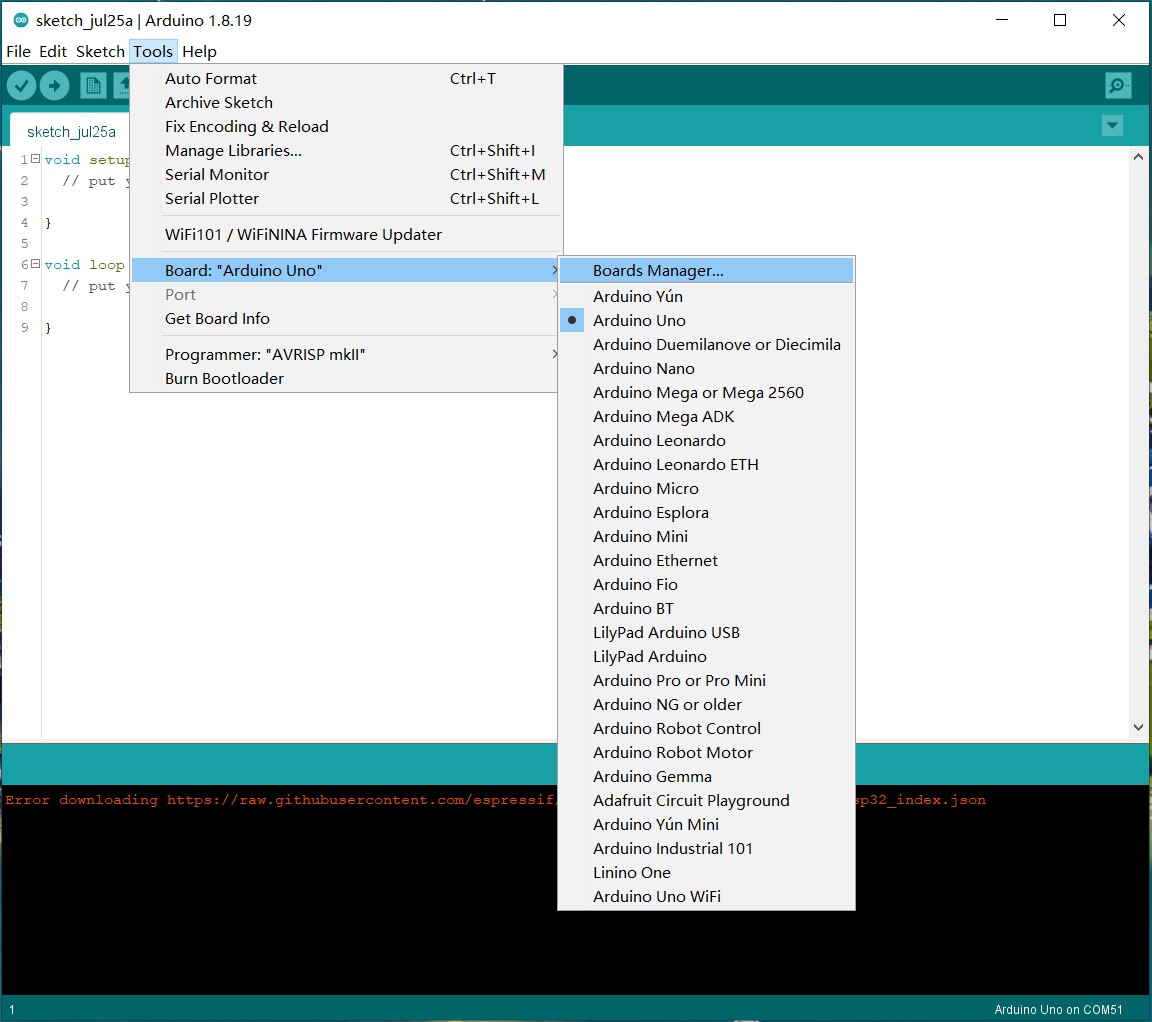
Search “esp8266” and click “Install”
Simple Test
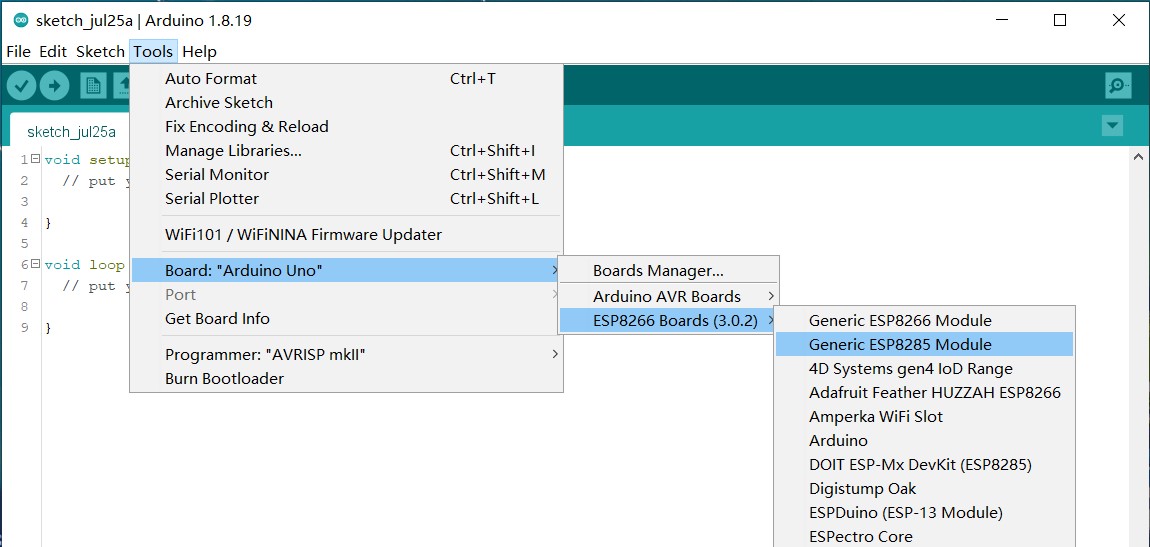
Open “Tools”>“Board”>“ESP8266”>”Generic ESP8285 Module”

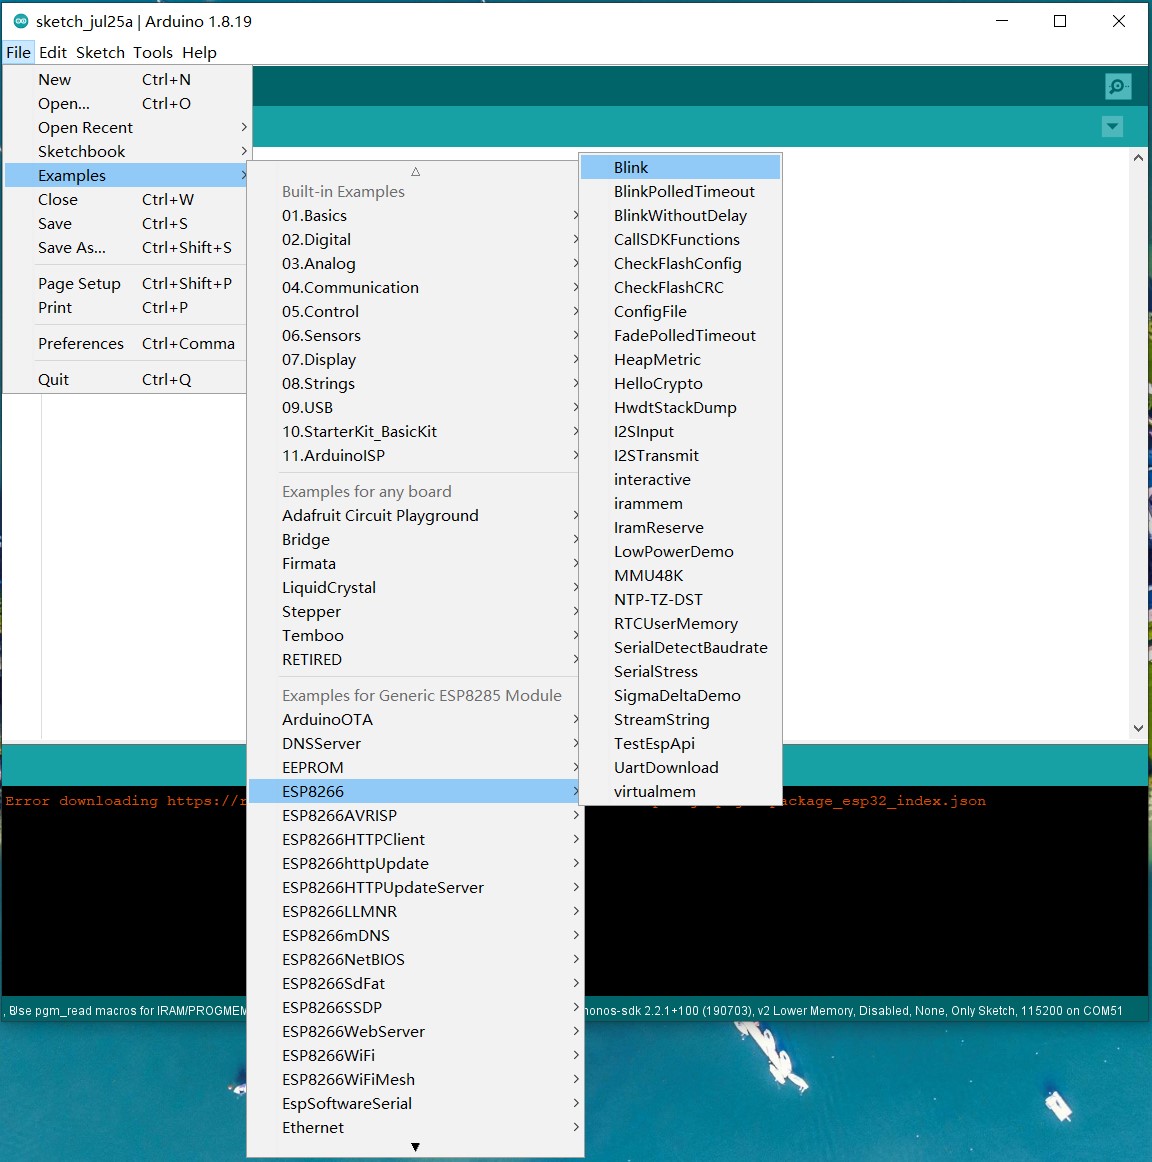
Open “File”>“Examples”>“ESP8266”>“Blink”
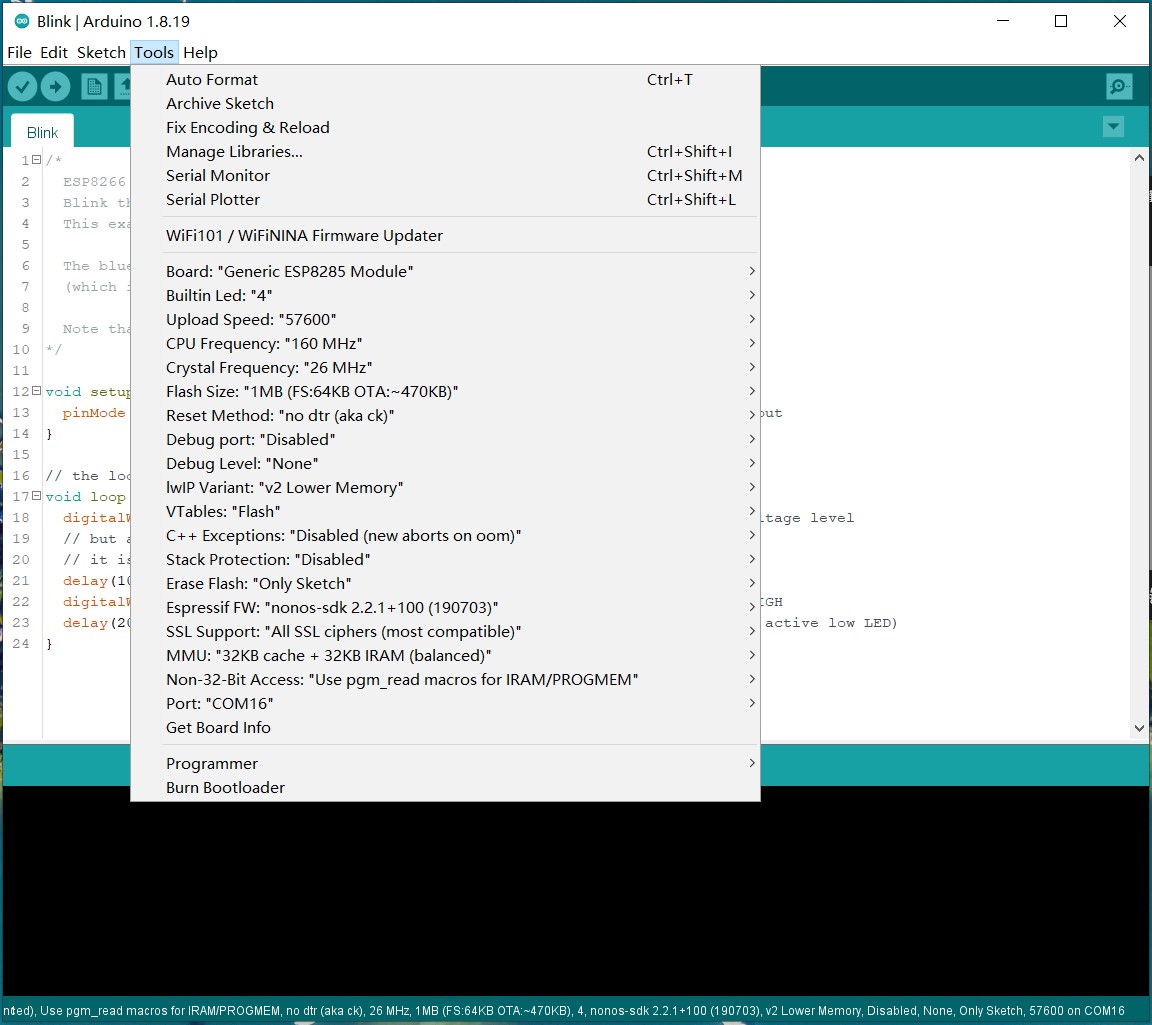
Connect Sentry2 to PC via an USB-TypeC cable. Open “Tools” and do seme settings as shown in the bellow Buildin Led:“4” CPU Frequency:“80MHz” or “160MHz” Upload Speed:“57600” Reset Method:“no dtr (aka ck)” Poart:“COM xx”(The USB Com Port)
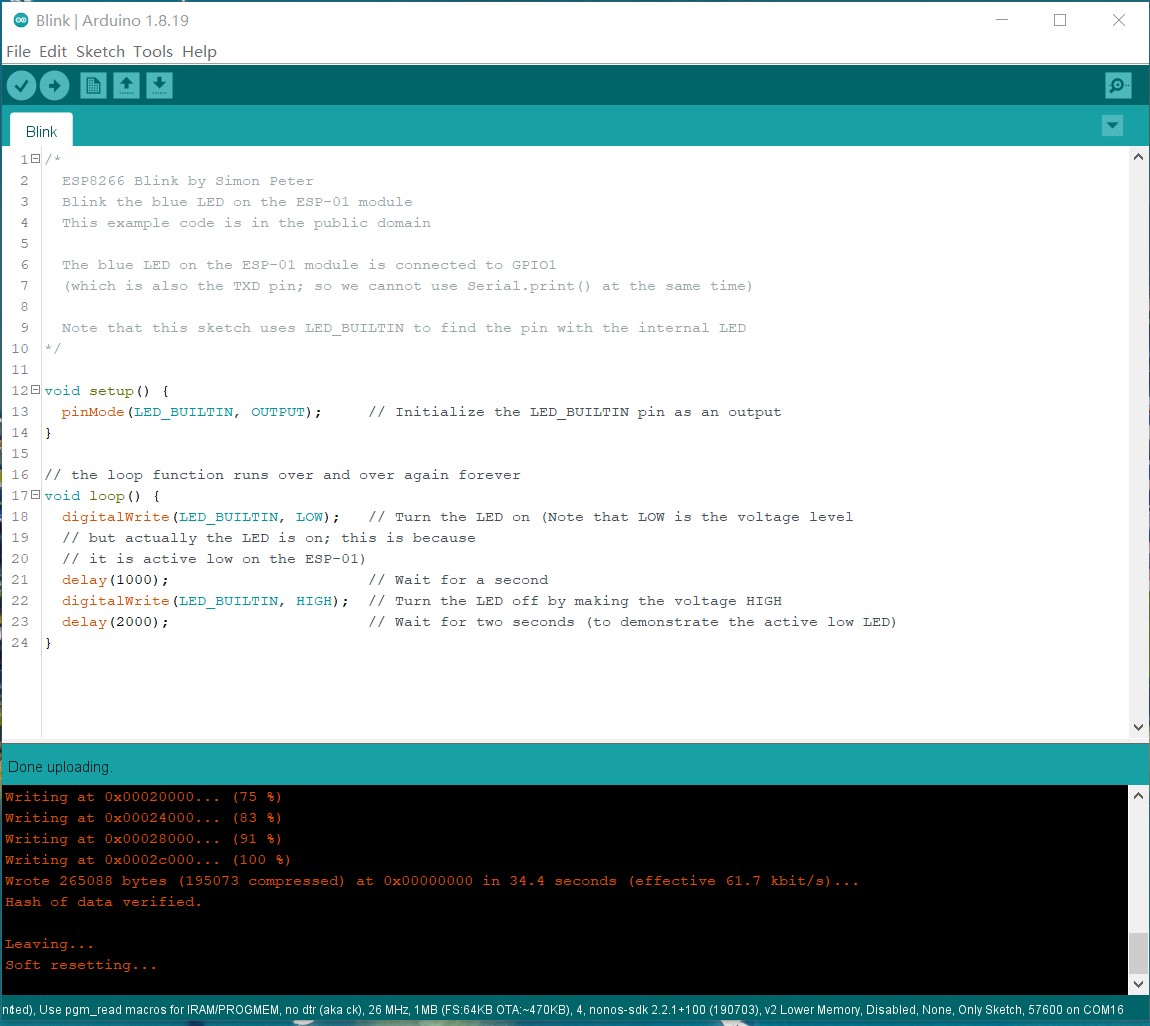
Push the Stick button downward and hold it(NOT Vertical Press), Click “upload” to start compiling and uploading, hold the Stick button downward until the screen shows the xx% progress.
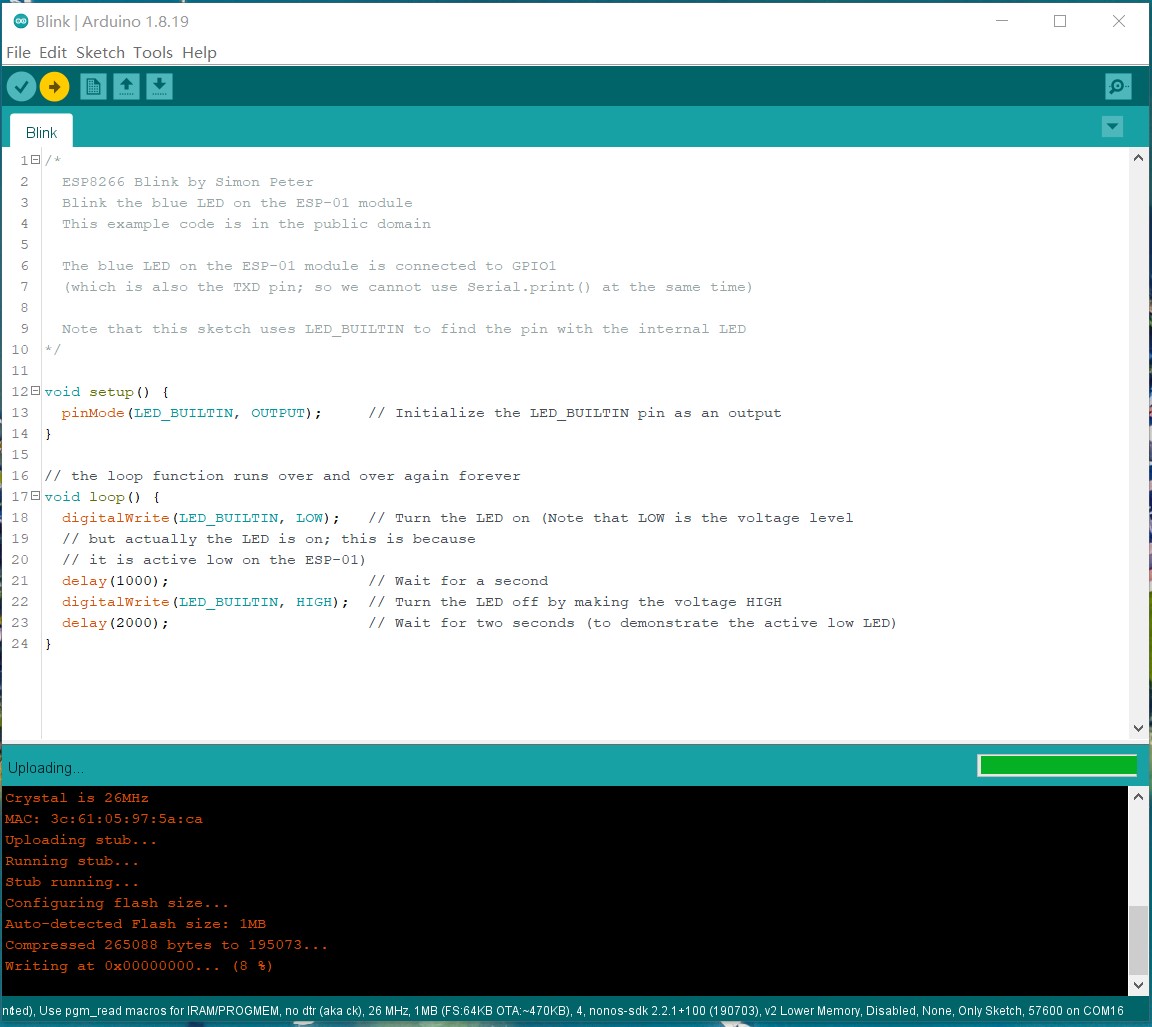
Wait firmware uploading until 100%
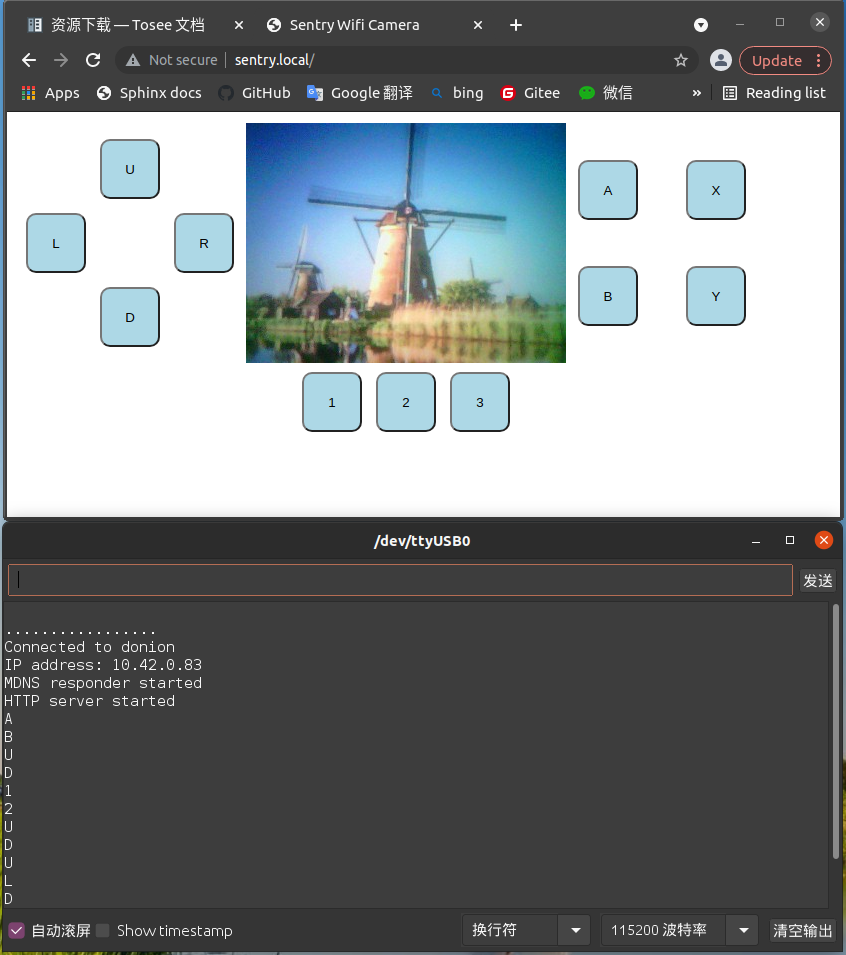
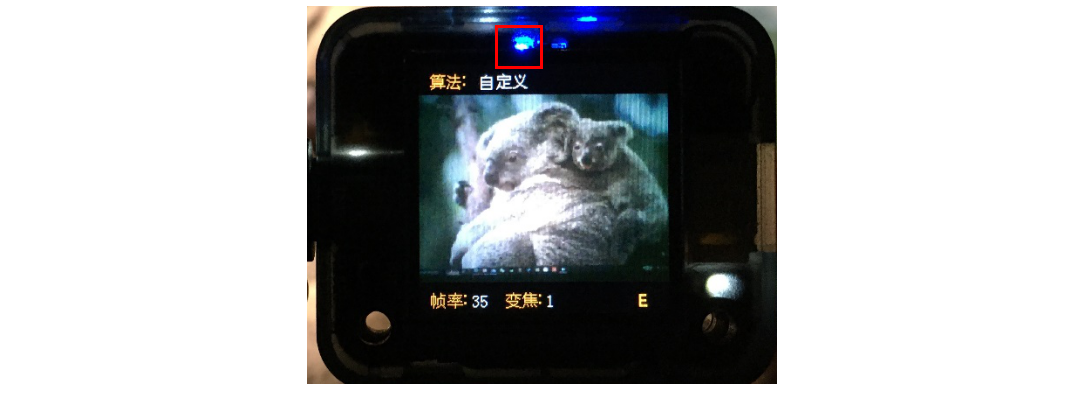
Restart the Sentry and runs the “Custom” vision, the Blue WiFi LED will be keep bright and the Custom LED will be blink.

WiFi Demo
Some open source WiFi programs are provided.
NOTE: The third-part AI Cloud Service may require an account or payment for use. Please read the terms of use carefully
NOTE: These demos are only used as a reference for the use of WiFi function, and does not provide a guarantee for the identification performance, security, or availability
Bemafa AIoT - Image Upload
Arduino Code: sentry2_esp8285_bemfa_image_transfer.zip
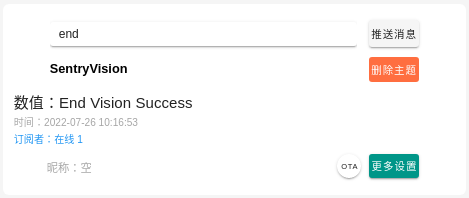
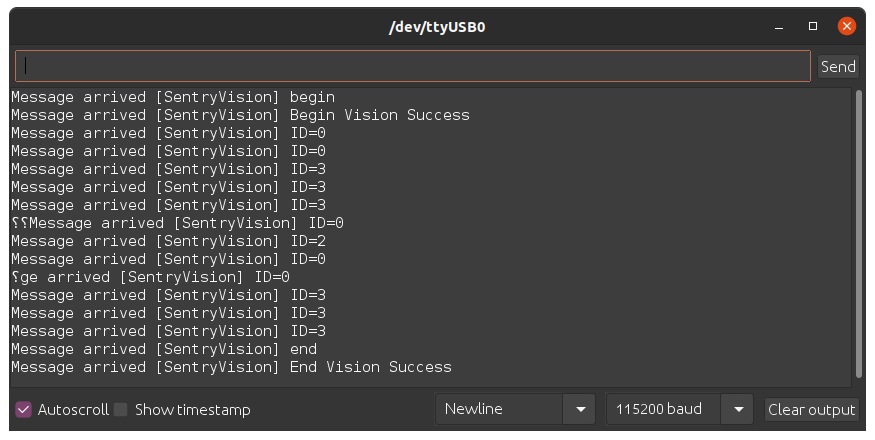
Bemfa AIoT - MQTT for Sentry2
Arduino Code: sentry2_esp8285_bemfa_mqtt_run_vision.zip

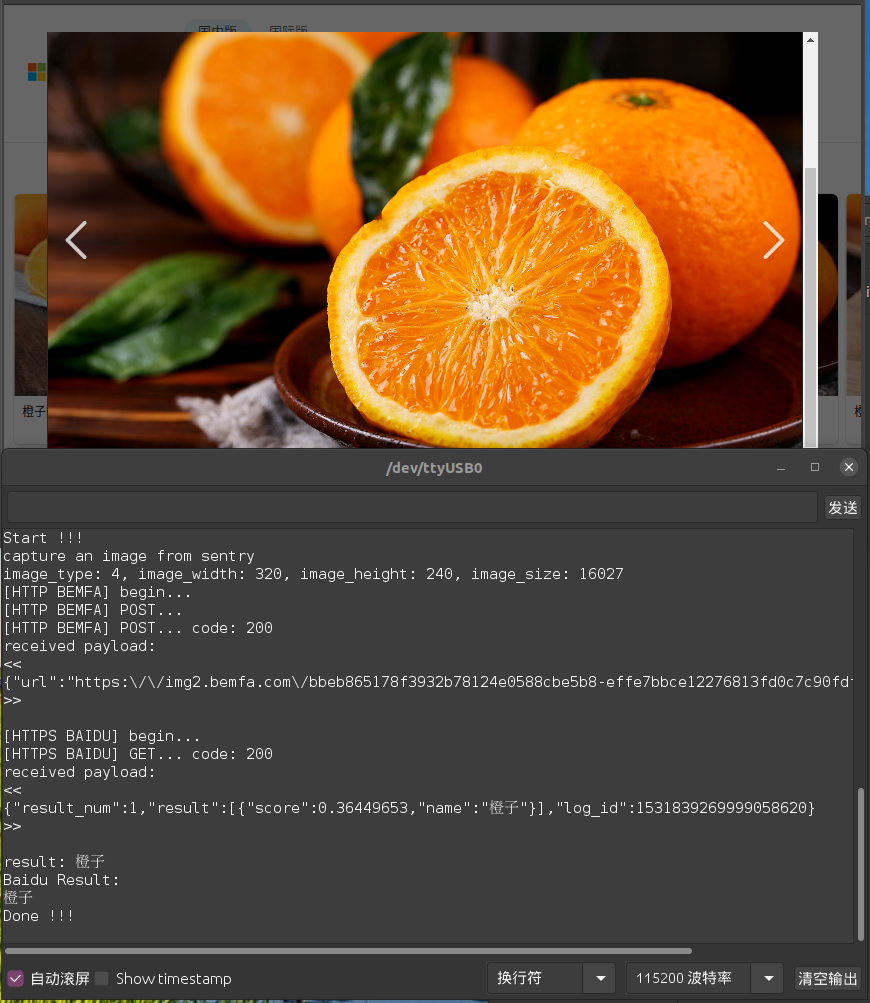
Baidu AI - Ingredient Classify by URL
Arduino Code: sentry2_esp8285_baidu_ingredient_classify_by_url.zip
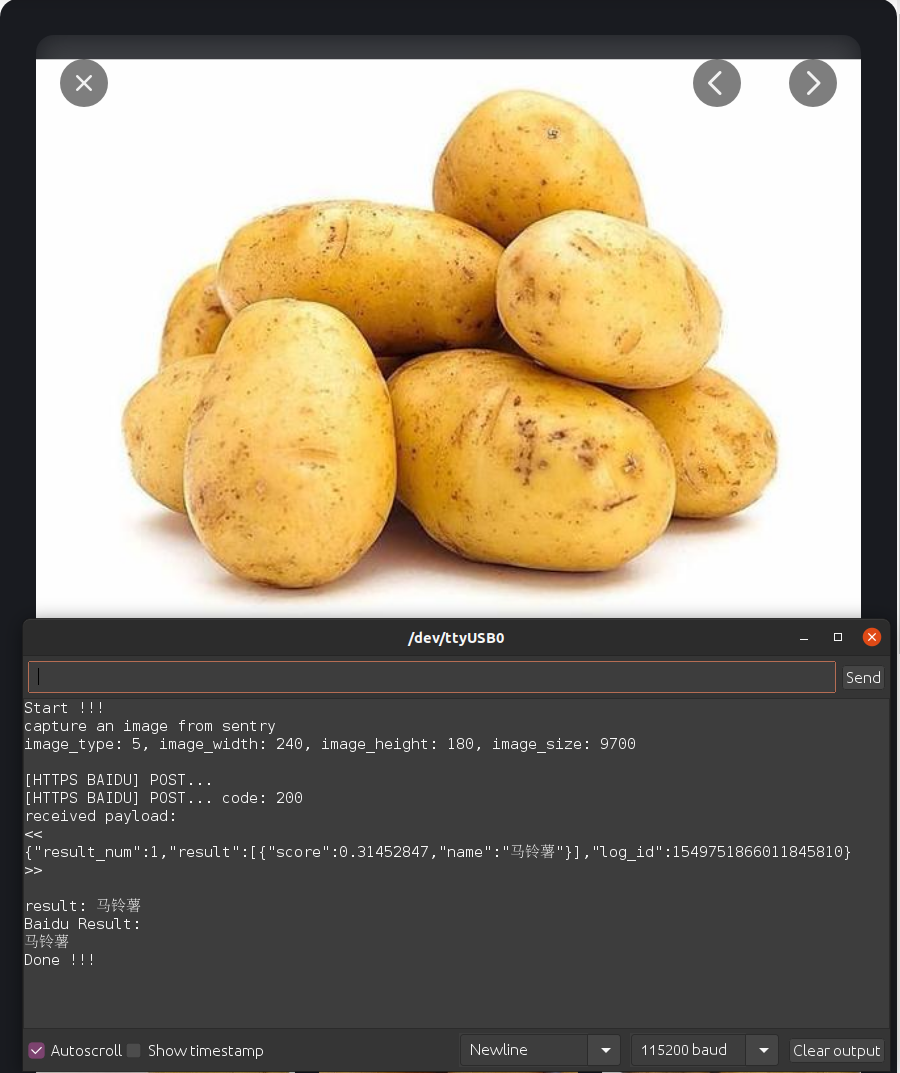
Baidu AI - Ingredient Classify by Image
Arduino Code: sentry2_esp8285_baidu_ingredient_classify_by_image.zip
Baidu AI - License Plate
Arduino Code: sentry2_esp8285_baidu_ocr_license_plate_by_image.zip

Baidu AI - OCR-Optical Character Recognition
Arduino Code: sentry2_esp8285_baidu_ocr_general_basic_by_image.zip

Baidu AI - General Object Classify
Arduino Code: sentry2_esp8285_baidu_general_by_image.zip

Baidu AI - Gesture
Arduino Code: sentry2_esp8285_baidu_gesture_by_image.zip

Microsoft Azure - General Object Classify
You need an Azure account to use this demo. Details at Azure Homepage: https://azure.microsoft.com/en-us/
Arduino Code: sentry2_esp8285_microsoft_azure_detect_objects_by_image.zip
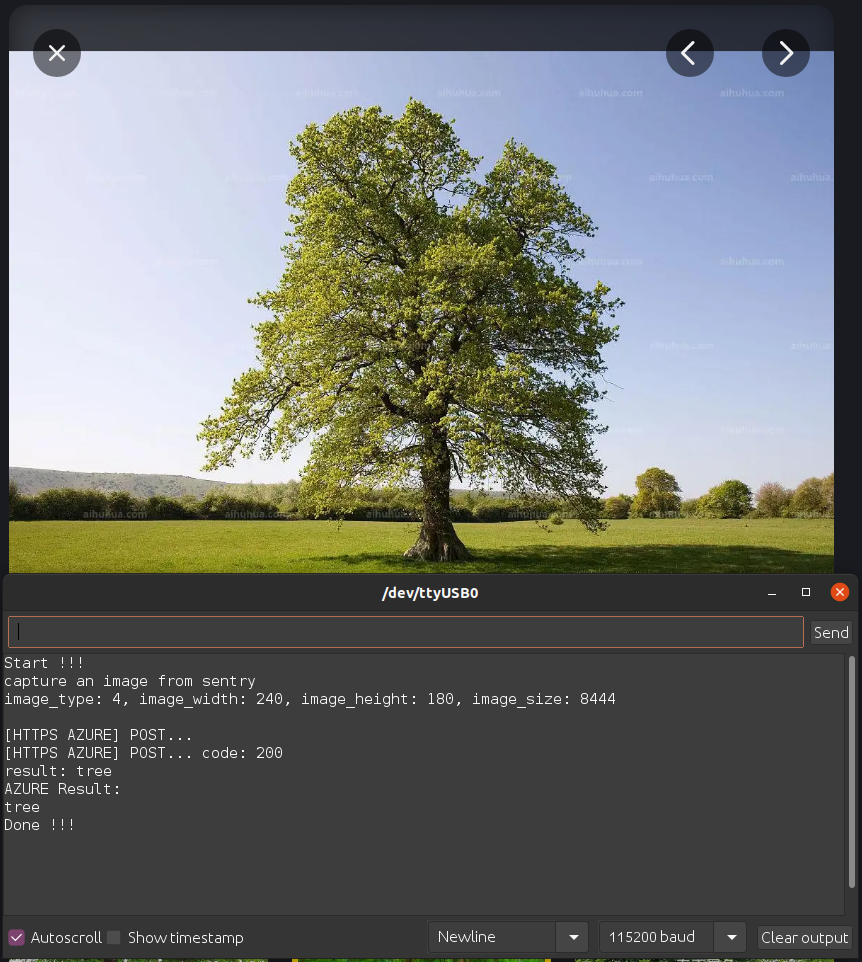
Image Transmission and Remoter
Arduino Code: sentry2_esp8285_image_transfer_remoter.zip